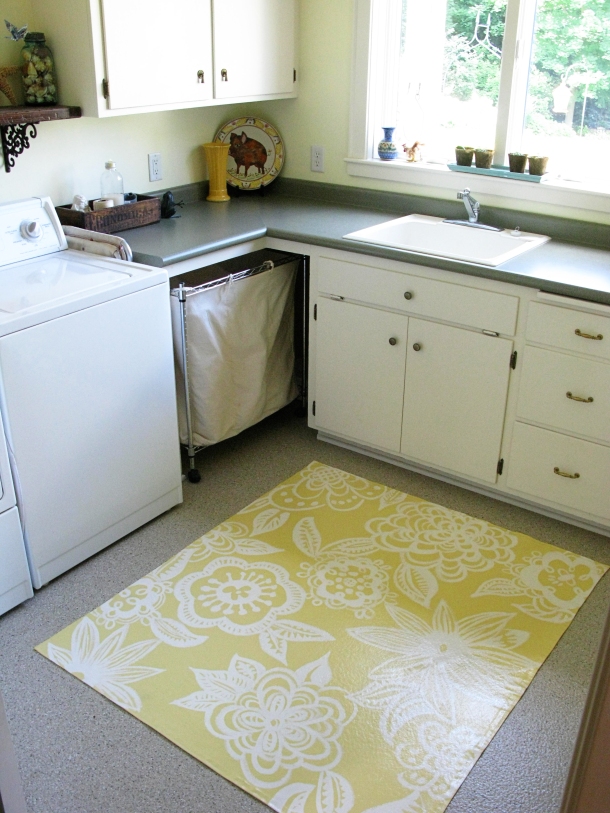
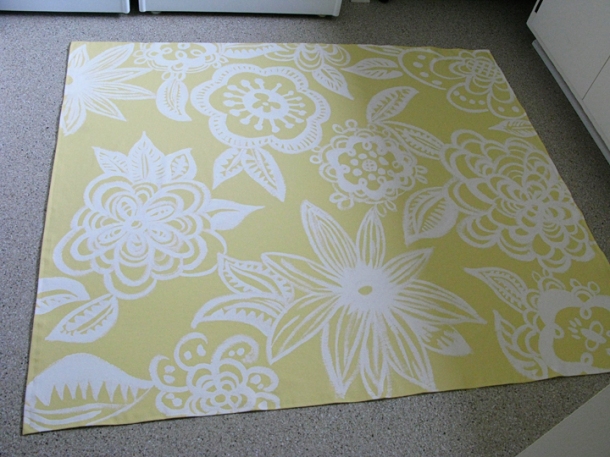
I saw some beautiful painted floor cloths at a Craft Show that I attended this past winter. Since then, I have been inspired to make one for my laundry room. I checked out some instructions on the web to get an idea of how to make one but of course, I improvised with the materials I had on hand. Here is how I did it.
Step ONE – Wash a piece of heavy weight natural canvas. I happened to have some in my fabric closet. I tossed it into the washing machine to shrink it and take out the sizing. It came out of the wash much smaller and a bit tangled.
Step TWO – Smooth out the tangles and begin to iron it FLAT. I ironed and ironed and ironed until I thought my arm might fall off. This is a crucial process because the rug needs to lay smooth without wrinkles or buckles. Take your time and do this well.
Step THREE – Fold all edges under about 1 inch. Take care to miter the corners for a nice finished look. To do this, fold a triangle at each corner, then fold the two sides in to meet. There should be a diagonal line like the corner of a picture frame. You can trim away a bit of the triangle to take out some bulk. Then sew. I first Zigzagged the unfinished edges before I straight sewed the hem. Make sure that your rug is square and even. I have read that you can staple the canvas around a hollow door to create a perfectly straight line for the hem. I did not do this because my rug was not the right size but if you have something like a door that is the correct size, this seems like a good idea.
Step FOUR – Prime the canvas. I rummaged around my left over paint and found some white ceiling paint to prime my canvas. I used a roller and painted both sides. I did this on my basement floor with a piece of plastic under the project. I think I put 2 coats of primer on each side. This is important because canvas is porous and needs to be sealed before the real painting can begin. My 48″ X 58″ canvas used up about three quarters of a gallon can of paint. It soaked and slurped up that much!
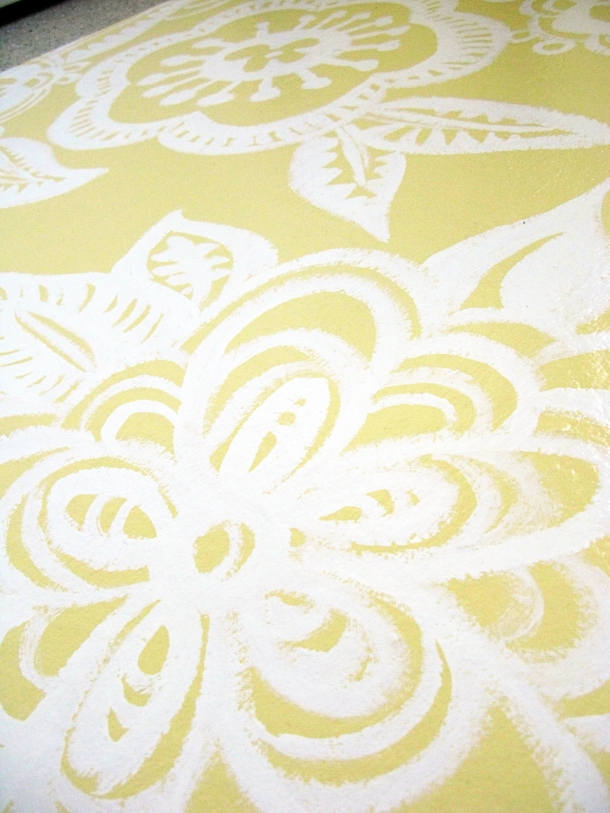
Step FIVE – Now the fun part can begin. I found this pattern from a rug that I saw at Anthropologie. You can take inspiration from books, fabric, china; look around. Once again, I used wall paint leftover from a different project. I was feeling mighty fine since I was using all found materials that were tucked away in the far corners of my house.
Step SIX – Paint the background color first. Let paint dry before applying the next color. Experiment and play. Let the rug dry thoroughly (over night) before the next step.
Step SEVEN, EIGHT, NINE and TEN – Brush on a finish coat of Polycrylic water based Minwax protective finish. Let each coat dry before the next. I did this over the course of a few days.
Ta Da! You are done. Use a non skid pad underneath the floor cloth because it can be slippery. Wipe clean when necessary. Enjoy!
-Peg


I’m curious as the the feel of these rugs. To the paint and finish make them feel stiff? Or similar to a shower curtain? I want to make one for my living room I have kids and they’re constantly making stains on our living room carpet, but I still would like to be able to comfortably walk around bare foot,
This is such a beautiful rug!!! I’m so glad I found it. I’m actually going to try this out. Wish me luck Sandy
Has anyone ever made a floorcloth without priming it first? I want to use walnut stain for much of the cloth, don’t want the white first. Then poly it to set the stain. I want more of a parched look for my border. Part of it will have color and I will prime that area. Around the colored part, I just want to use poly…again to make just a parchment look. Any ideas or suggestions?
Where in South Africa can I learn how to paint a floor cloth and make my own designs.
I agree that wear what you want.
what kind of coach outlet locations worth to buy? http://www.migrainescure.net/content/mynnudg.asp?tip=a54b71afbbda5d3f682f62d5a45d009e.html
Or if they promise in a few weeks, your company will be on the front pages of Google, and then you
know you’re dealing with one of them. Both companies, however, quickly apologized, fixed the offending pages, and were restored to Google’s list.
A website is of little value if your customers can’t find it, though, and that’s
where online marketing services come in to the picture.
Did you use a paint brush to do the flowers?
Reblogged this on Adri In Aly's Blog and commented:
No cash for an expensive rug try re painting with this great tutorial… My hat goes off to you I would so need a stencil I could never make my flowers look like these….
I am extremely impressed along with your writing talents and also with the structure in your blog. Is that this a paid theme or did you customize it yourself? Anyway stay up the excellent quality writing, it is rare to look a great blog like this one these days..
Pingback: Painting Brass – A Tutorial « Just About Home
Really great floor cloth. I took an art cloth class last year and priming it with gesso will help it not absorb so much paint. But as gesso is expensive, leftover ceiling paint works! Anyhow, glad I found you, love this idea.
Exactly! Gesso is expensive and since ceiling paint or primer for that matter does pretty much the same thing, I figured I’d give it a try. My floor cloth is now about 1 year old and is holding up great. You should make one! Thanks for the comment!
PS I love your flower pillows! They are giving me the inspiration to paint another floor cloth or maybe a wall hanging…
Absolutely LOVE this! Especially the pattern you chose! Soooo impressed you free-handed this!
I’m going to have to give this a try!
I would be thrilled if you would link this up at my first ever Feature Friday Free-for-All (we already have over 200 links and still growing! Sooo exciting! : ))
…going on right now!:
http://www.fivedaysfiveways.com/2012/01/feature-friday-free-for-all-1.html
P.S. I’m your newest subscriber : )
~Abbie (www.fivedaysfiveways.com)
Pingback: Just About Home’s Hot Projects of 2011 « Just About Home
Pingback: Laundry lines « Just About Home
Stopping in after finding you on Pinterest. I think your project will be the solution to covering up my horrible, horrible vinyl in the kitchen, I just finished painting the kitchen and now the vinyl sticks out like a sore thumb! Thanks for the instructions. I love the pattern you chose.
Camille
Oh yes, go for it! I would love to see the finished result! Thanks for stopping by.
Oh wow, what a great project!! I have a piece of canvas drop cloth in my garage that I always look at and think about painting…now thanks to you I know I can! I can’t believe you free-handed all those pretty flowers. I would have needed a stencil for that! I found you from dreamitbuilditstyleit…can’t wait to check out more of your blog!
I hope you take the plunge! It is not a difficult project. I want to see your finished rug! Good luck. Thanks for checking out our blog.
Just thought you’d like to know I included this project in my Coud de Coeur weekly post. See it at dreamitbuilditstyleit.blogspot.com.
Great project!
Thanks, Nancy! Lucky you to live in Montreal, one of my favorite cities!
Lovely, Lovely! Beautiful color, fabulous design.
You are too kind, Mary!
I love your design! It is so beautiful.
I actually have a painters canvas dropcloth sitting on my shelf waiting for me to open so that I can make my own floorcloth. Yours turned out so beautifully, it might just be the motivation I need to work on my own!
Oh, I hope you go for it!
Beautiful! It really brightens up your laundry room. Good tutorial.
Kathy
Thanks Kathy!
Found you on Someday Crafts! I had to stop by and say I love your floor cloth and tutorial…fabulous job!
Thanks for stopping by, glad you like it!
Does it move on the floor a lot? I was thinking about making one to be on carpet but was worried that it wasn’t heavy enough to stay in place..
It’s a bit slippery on the linoleum floor, so there’s a pad underneath it. Not sure how it would do on a carpeted floor though. Thanks for visiting and commenting!
This is genius! I’m in the process of making an area rug but I might have to make a second one know that I saw this.
Thanks! Let us know if you make one!!
Did you freehand the design? It looks so perfect! This is beautiful and an inspiration.
The design was mostly freehand, inspired by a design from an anthropologie rug.
This is gorgeous! I’m in love with it. I am featuring this at somedaycrafts.blogspot.com. Grab my “featured” button.
Thanks for the link and the feature. The button is on the sidebar!
This is really great! I have made a couple of floor cloths but I’ve always used vinyl/linoleum on the back side of it.
Your hard work was well worth such a fantastic area rug.
wow, that looks like a rug you would pay a lot of money for. I love the choice of colours
The best part was that I was able to use up some old paint and canvas so it cost me almost nothing!
Thanks! It should hold up well. It is like a piece of linoleum. If it ever gets worn, I can varnish it again.
This is WAY cool! And I’d love to hear how it holds up over time. It looks absolutely gorgeous.